When an effect is finished enough to be usable without needing to be fixed every time, then the programming task fades, and the exploration phase starts. For Comber 0v02, this is where serendipity stepped in. I was seeing what the results of some of the control settings were with the new Limiter function, and I was adjusting the Limiter depth control live, riding it as if it was just another controller. And surprisingly, the result was interesting...
| Equalizer / Compressor / Limiter (Photo credit: HSmade) |
But tweaking the Limiter depth control gave another interesting - and not natural - sound. Some similarities to gated reverb, but because it was mixed up with the comb filtering, it was worthy of further exploration...
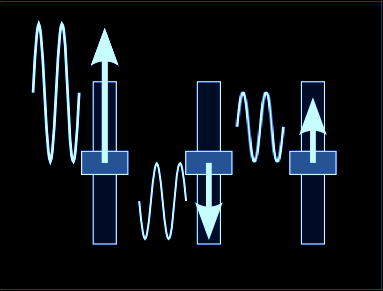
So I added an LFO to the Limiter control and stripped out all of the comb filtering, resulting in LFO Limiter 0v01, where the depth of limiting changes over time. And because the Limiter depth control is adjusting multiple parameters inside the limiter library object, the LFO is doing something that would require very nimble finger movements on a conventional set of limiter controls.
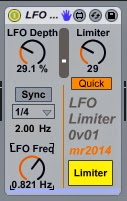
Limiter 0v01 has very few controls. The 'Quick/Smooth' time response mode switch is the same as in Comber, and the LFO is my usual free/sync sine wave taken from the MaxForLive examples. Because I'm trying to focus the attention of the user on the sound and not the technicalities, I have deliberately not put any animated display of the limiting process in action. After all, you don't show a representation of the comb filter spectral response in a phaser or flanger... Instead you get my standard 'Modulation slider' display that I tend to use whenever a value is modulated by an LFO - in this case the Limiter is modulated by the LFO Depth control. I much prefer bouncy little dots to the usual Ableton method of animating the modulated control (where the Limiter control rotates back and forth in time with the LFO modulation).
LFO Limiter should be on the MaxForLive.com site soon, and can produce some very unusual rhythmic and syncopated effects, particularly when preceded or followed by some echo.
The best way to explore it is to start out with the LFO Depth set to zero, and just get familiar with the effect of the Limiter control: zero is no limiting, 100 is pure 'pumping'. A setting of about 30 is a good place to start introducing LFO modulation, and my initial preference was to match the LFO Depth and Limiter settings, so try 30 for the LFO Depth at first. (I did contemplate having a single control that replaced the two, but the 'same setting' for both is not always appropriate for some source material, so I have left them as two separate controls.) After that, just tweak and explore.
Using LFO Limiter
The best way to explore it is to start out with the LFO Depth set to zero, and just get familiar with the effect of the Limiter control: zero is no limiting, 100 is pure 'pumping'. A setting of about 30 is a good place to start introducing LFO modulation, and my initial preference was to match the LFO Depth and Limiter settings, so try 30 for the LFO Depth at first. (I did contemplate having a single control that replaced the two, but the 'same setting' for both is not always appropriate for some source material, so I have left them as two separate controls.) After that, just tweak and explore.


No comments:
Post a Comment